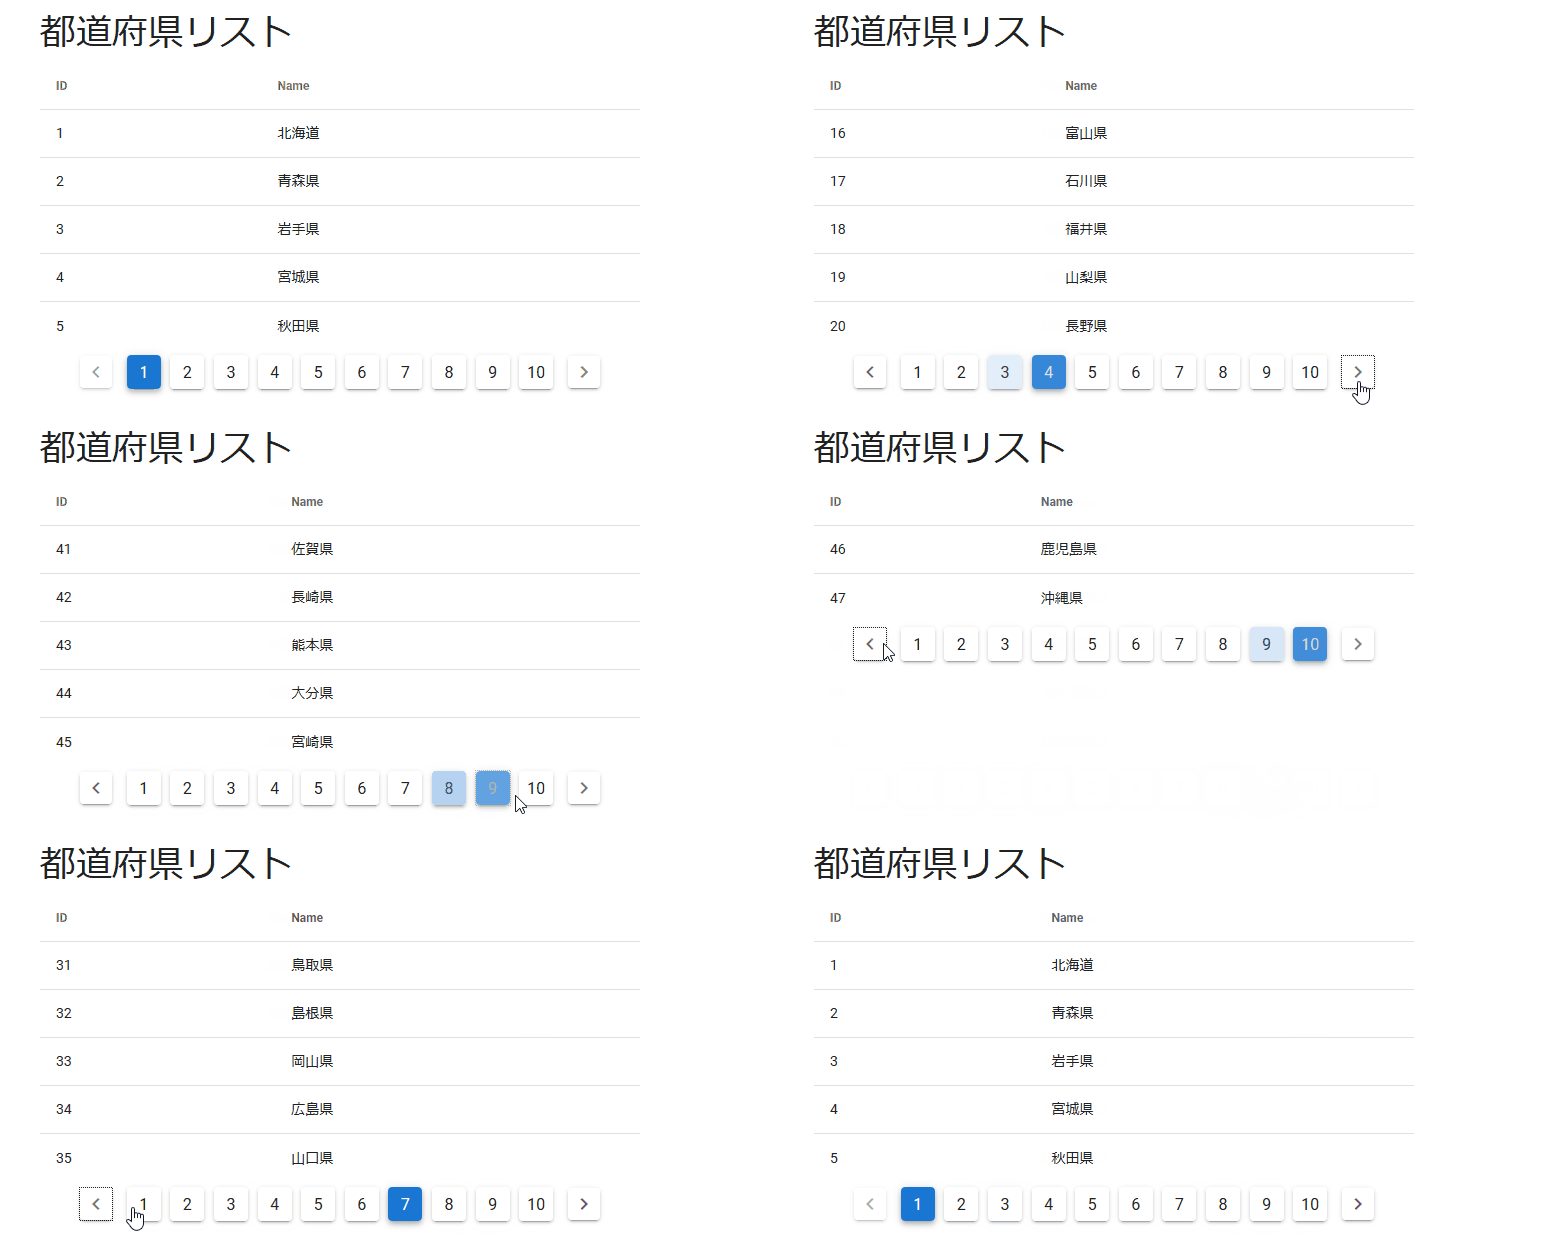
簡単にページネーションを作れるVue/VuetifyのPaginationを使ってみます。
Laravel側からAxiosを使ってAPIでデータを取得し、Vuetify/SimpleTablesで一覧表示させてそのページネーションとしてVuetify/Paginationを配置。
またURLはそのまま変わらないのでVue側のJavascriptでURLの書き換え、スクロールバーがある場合はページトップへの移動を行います。
開発環境
Laradock v10
Laravel 7
Vue 2.6
Vuetify 2.2
ファイル構成
app
 ┣ Http
 ┃ ┗ Contollers
 ┃    ┗ PrefController.php
 ┗	Models
	┗	Pref.php
resources
 ┣ js
 ┃ ┣ components
 ┃ ┃ ┗ PrefListComponent.vue
 ┃ ┗ router.js
 ┗ views
    ┗ app.blade.php
routes
 ┗ api.php
Vuetify/Paginationの説明
簡単にページネーションを作れるVue/VuetifyのPagination。
Vuetify公式サイトのページネーション(https://vuetifyjs.com/ja/components/paginations/)で基本的な設定は以下のようなものです。
<template>
  <div class="text-center">
    <v-pagination
      v-model="page"
      :length="6"
    ></v-pagination>
  </div>
</template>


<script>
  export default {
    data () {
      return {
        page: 1,
      }
    },
  }
</script>
v-modelとしてのpageは現在ページを示し、lengthは最終ページを設定します。
LaravelのAPI側からは最終ページ(last_page)だけあればページネーションは完成ですね!
プロパティとしては他にも
total-visible:ページ要素の最大数:ページ要素数は自動的に決定されますが、あまり増やしたくない場合に使用します。
prev-icon:「前へ」のアイコンを設定することができます。
next-icon:「次へ」のアイコンを設定することができます。
circle:要素を円形にします。
color:色を設定できます。
などがあります。
イベントとしては
input:現在のページが変更されたときページ番号を返します
next:「次へ」がクリックされたとき
previous:「前へ」がクリックされたとき
Laravel側の各種設定
APIで都道府県の番号と名前を返すだけのシンプルなアプリケーションを作成します。
モデルの準備
テーブル名:prefs
モデル名:Pref
<?php

use Illuminate\Database\Migrations\Migration;
use Illuminate\Database\Schema\Blueprint;
use Illuminate\Support\Facades\Schema;

class CreatePrefsTable extends Migration
{
    /**
     * Run the migrations.
     *
     * @return void
     */
    public function up()
    {
        Schema::create('prefs', function (Blueprint $table) {
            $table->id();
            $table->string('name');
            $table->timestamps();
        });
    }

    /**
     * Reverse the migrations.
     *
     * @return void
     */
    public function down()
    {
        Schema::dropIfExists('prefs');
    }
}
<?php
namespace App\Models;
use Illuminate\Database\Eloquent\Model;
class Pref extends Model
{
protected $fillable = ['name'];
}コントローラーの作成
<?php

namespace App\Http\Controllers;

use Illuminate\Http\Request;
use App\Models\Pref;

class PrefController extends Controller
{
    public function index()
    {
        $data = Pref::select(['id', 'name'])->paginate(5);
        return response()->json(['result' => $data]);
    }
}
1ページ当たりの件数は適宜変更してください。
http://localhost/api/pref にアクセスすると以下のような結果を返します。
{
  "result":{
    "current_page":1,
    "data":[
      {"id":1,"name":"\u5317\u6d77\u9053"},
      {"id":2,"name":"\u9752\u68ee\u770c"},
      {"id":3,"name":"\u5ca9\u624b\u770c"},
      {"id":4,"name":"\u5bae\u57ce\u770c"},
      {"id":5,"name":"\u79cb\u7530\u770c"}
    ],
    "first_page_url":"http:\/\/localhost\/api\/pref?page=1",
    "from":1,
    "last_page":10,
    "last_page_url":"http:\/\/localhost\/api\/pref?page=10",
    "next_page_url":"http:\/\/localhost\/api\/pref?page=2",
    "path":"http:\/\/localhost\/api\/pref",
    "per_page":5,
    "prev_page_url":null,
    "to":5,
    "total":47
  }
}
ルートの設定
APIでアクセスするのでapi.phpに設定します。
Route::get('/pref', 'PrefController@index');http://localhost/api/pref でアクセスできるようにします。
Vue/Vuetifyで作成してみよう
Bladeファイル
<!doctype html>
<html lang="{{ str_replace('_', '-', app()->getLocale()) }}">
<head>
  <meta charset="utf-8">
  <meta name="viewport" content="width=device-width, initial-scale=1">

  <!-- CSRF Token -->
  <meta name="csrf-token" content="{{ csrf_token() }}">

  <title>{{ config('app.name', 'Laravel') }}</title>

  <!-- Scripts -->
  <script src="{{ asset('js/app.js') }}" defer></script>

  <!-- Fonts -->
  <link rel="dns-prefetch" href="//fonts.gstatic.com">
  <link href="https://fonts.googleapis.com/css?family=Nunito" rel="stylesheet">
  <link href="https://fonts.googleapis.com/css?family=Roboto:100,300,400,500,700,900" rel="stylesheet">
  <link href="https://cdn.jsdelivr.net/npm/@mdi/font@4.x/css/materialdesignicons.min.css" rel="stylesheet">

  <!-- Styles -->
  <link href="{{ asset('css/app.css') }}" rel="stylesheet">

</head>
<body>
  <div id="app">
    <v-app>
      <v-content>
        <v-container>
          <router-view />
        </v-container>
      </v-content>
    </v-app>
  </div>
</body>
</html>
PrefListComponent.vue
SimpleTableで都道府県リスト一覧を表示させて、その下にPaginationを設置します。
<template>
<div style="max-width: 600px;">
  <h1>都道府県リスト</h1>
  <v-simple-table>
    <template v-slot:default>
      <thead>
        <tr>
          <th class="text-left">ID</th>
          <th class="text-left">Name</th>
        </tr>
      </thead>
      <tbody>
        <tr v-for="item in prefs" :key="item.id">
          <td>{{ item.id }}</td>
          <td>{{ item.name }}</td>
        </tr>
      </tbody>
    </template>
  </v-simple-table>

  <div class="text-center">
    <v-pagination
      v-model="page"
      :length="lastPage"
      @input="getPrefs"
    ></v-pagination>
  </div>
</div>
</template>


<script>
  export default {
    data () {
      return {
        page: 1,		// ページ
        lastPage: 1,	// 最終ページ
        prefs: {},		// 都道府県リスト
      }
    },
    created() {
      this.getPrefs(this.page)	// page=1として都道府県リストを取得
    },
    methods: {
      getPrefs(page) {
        axios.get('/api/pref', {
          params: {
            page: parseInt(page),	// /api/pref?page=[page]の形
          },
        })
        .then((res) => {
          const result = res.data.result
          this.prefs = result.data			// 都道府県リストを設定
          this.lastPage = result.last_page	// 最終ページを設定
        })
        .catch((err) => {
          console.log(err)
        })
      },
    }
  }
</script>
router.js
import Vue from 'vue'
import Router from 'vue-router'

import PrefList from './components/PrefListComponent.vue'

Vue.use(Router)

export default new Router({
    mode: 'history',
    routes: [
        {
            path: '/preflist',
            name: 'preflist',
            component: PrefList,
        },

    ],
})
完成

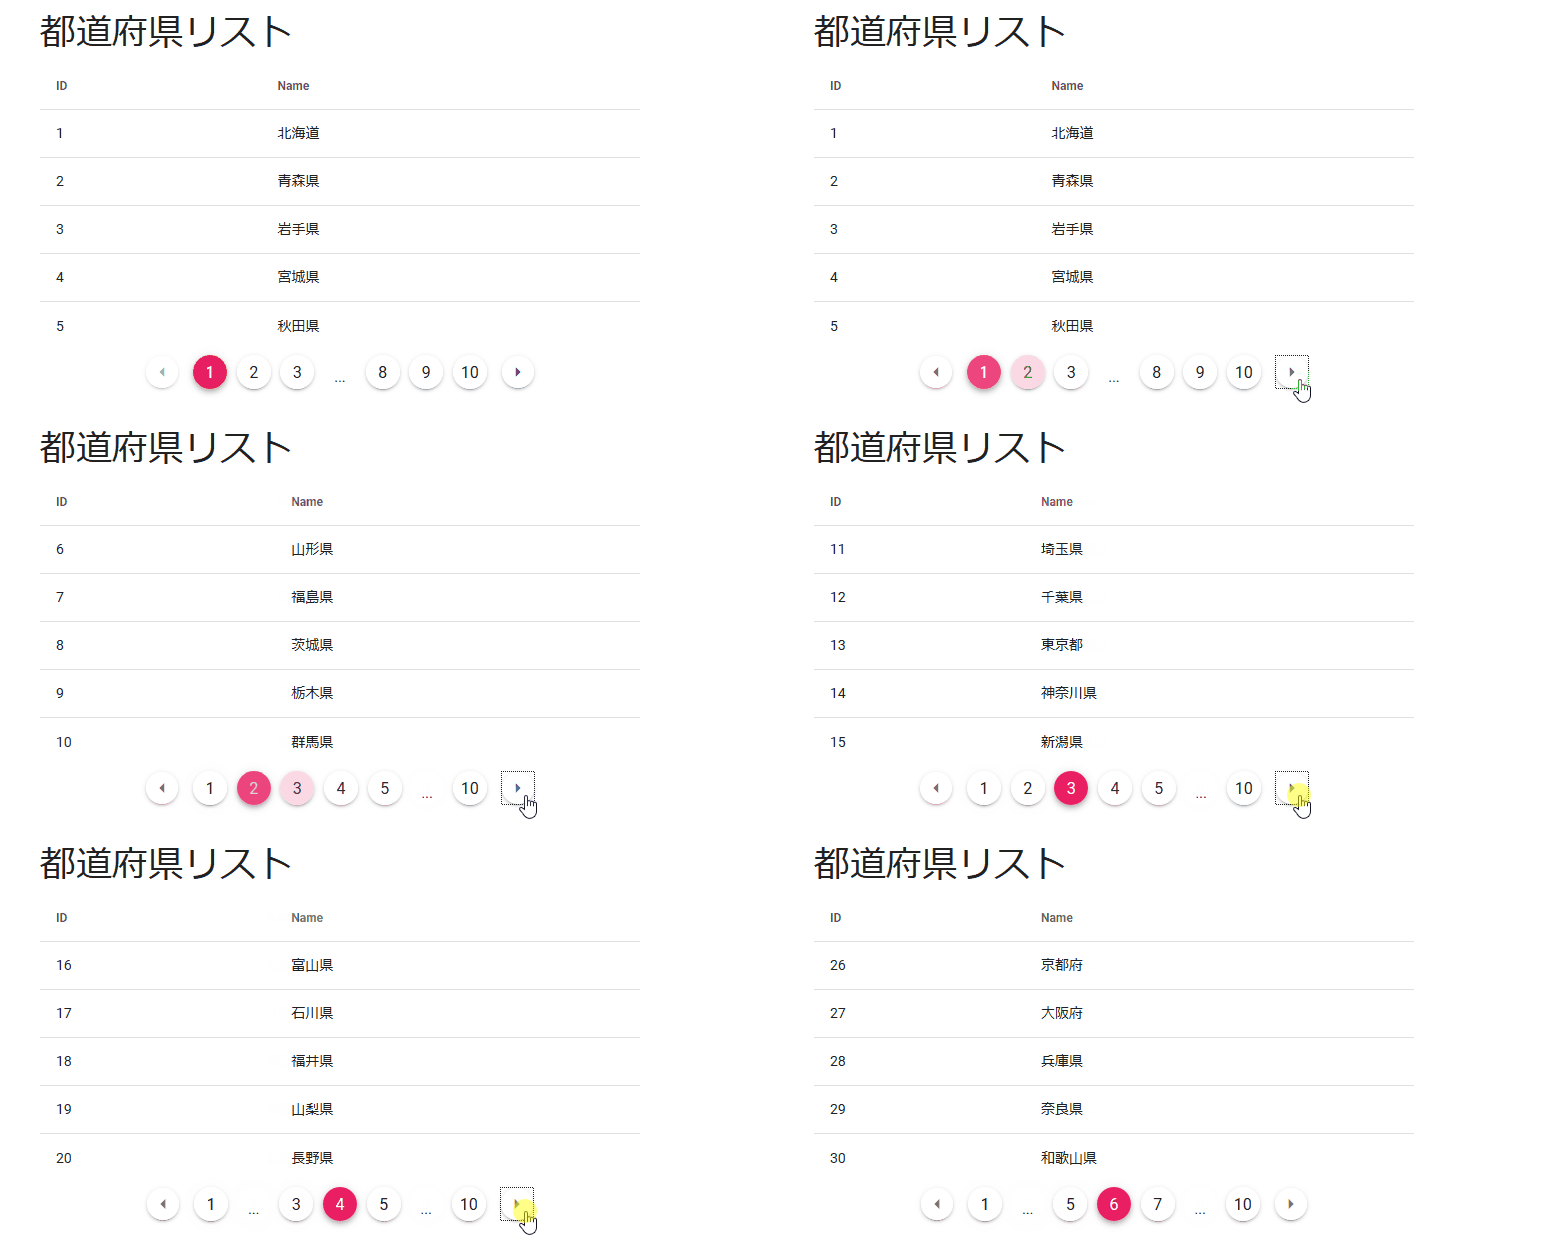
いろいろ設定変更してみる
    <v-pagination
      v-model="page"
      :length="lastPage"
      :total-visible="7"
      prev-icon="mdi-menu-left"
      next-icon="mdi-menu-right"
      circle
      color="pink"
      @input="getPrefs"
    ></v-pagination>
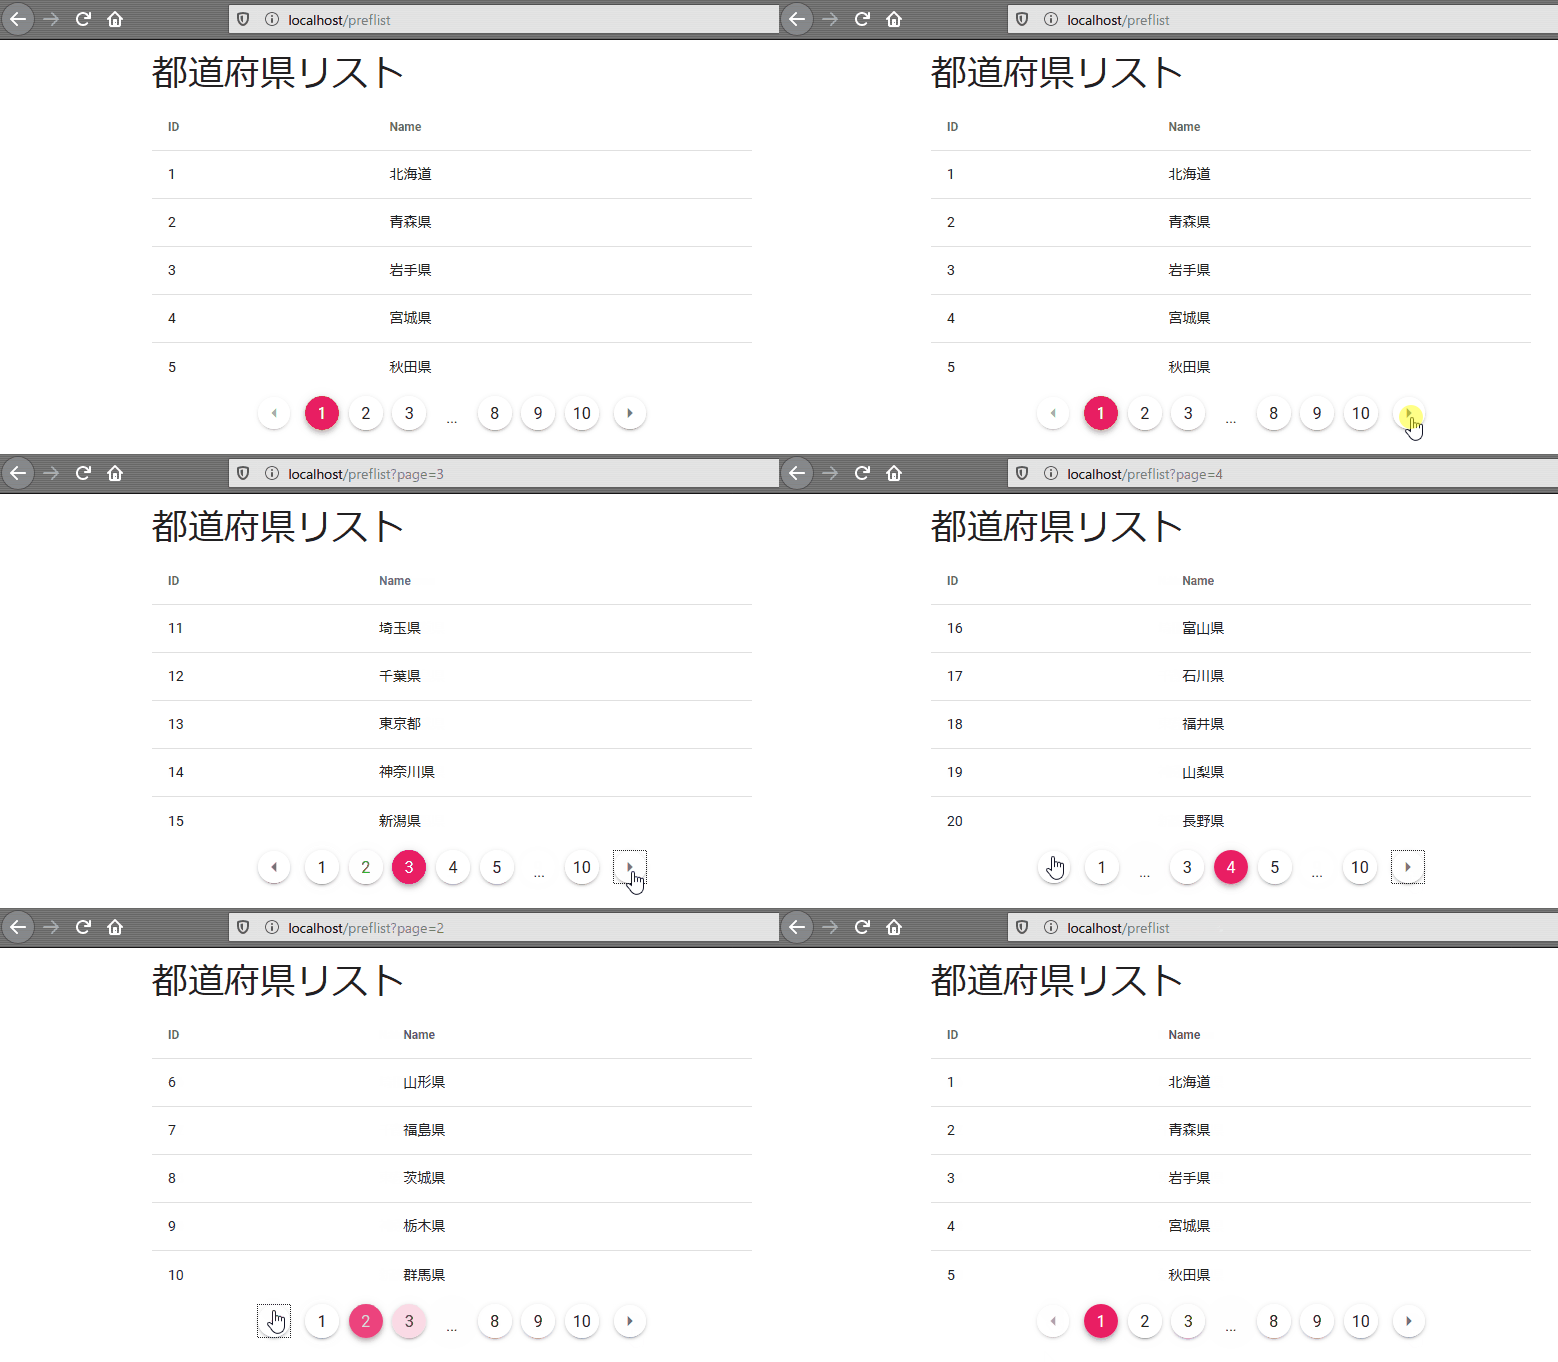
URL書き換え、ページトップへの移動
ページ移動しても同じコンポーネント内でデータが変わるだけなのでURLは変わりません。
?page=**というクエリストリングを追加したURLに変更してあげましょう。
      getPrefs(page) {
        axios.get('/api/pref', {
          params: {
            page: parseInt(page),
          },
        })
        .then((res) => {
          const result = res.data.result
          this.prefs = result.data
          this.lastPage = result.last_page
          // URL変更
          let url = '/preflist'
          if (this.page > 1) {
            url += '?page=' + this.page
          }
          window.history.pushState(null, null, url)
          // ページトップへ
          scrollTo(0, 0)
        })
        .catch((err) => {
          console.log(err)
        })
      },
Axiosでデータ取得した後、pageが1より大きいときだけ window.history.pushState(State, Title, URL) でURLだけを変更しています。
ついでにスクロールバーが出ているとき、ページトップにスクロールしておいたほうが親切なので scrollTo(0, 0) で移動させています。
